Thursday, Apr 24 2014 [25,724 miles]
The guestimate as to what the ultimate cause of the proplem that lead to this teardown was weak valve springs. It is a fact that the springs were old and tests show that they were weaker than new springs. But still… am I 100% sure that there wasn’t a cam issue? Time to find out.
test valve/piston clearance
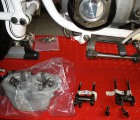
Test time
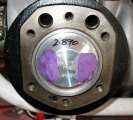
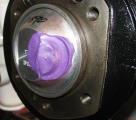
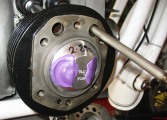
Clay on piston
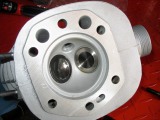
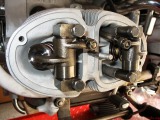
Cylinder head, no gasket
I put some clay on the piston and then mounted the heads. For a worse case check I did not use a head gasket and I set the valve lash to zero. The heads were fastened “snug”, not torqued to the specified amount. I didn’t want to over do it without a head gasket. I turned the moter over several revolutions then stopped with the left side at TDC between compression and power stroke.
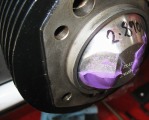
left side test

Must do it again
Plenty of space
I forgot to wipe down the valves with an oily finger so it wouldn’t stick the clay. I’ll need to do the test a second time.
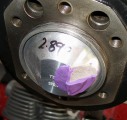
I cut away some of the clay to measre the thickness. It shows I’ve over 3.5 mm of clearance. Whan I add a head gasket I’ll get even more space.
left side 2nd try
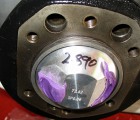
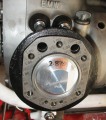
Intake has less clearance
About 1 mm
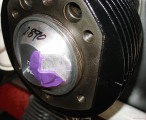
Still 1 mm
The second time the clay didn’t stick to the valve. The intake doesn’t have as much clearance as the the exhaust. I measured about 1 mm at closest contact (without a head gasket). I think that is enough.
right side test
Right side check
Results
Looking good
I remembered to oil the face of the valves so the clay didn’t stick when testing the right side. What did stick was a pushrod. More on that later. The results of the test show plenty of clearance on the right side, too.
install left head
head gasket
clean head
valve lash set
Fresh wavy washers

Buttoned up
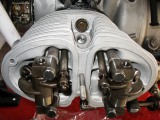
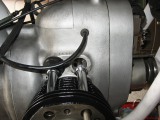
I installed the left head with a fresh head gasket and set the valve lash. I used my oil can to make sure the rocker arm was well lubricated as well as the rocker-to-valve surfaces. With the valve cover on the bike is beginning to look as it should.
install right head
Check pushrod tube seal

New gasket
I mentioned above that the pushrod was stuck. It felt as if I was pulling against a spring when I tried to remove the rod after taking off the rocker arm assembly. A closer look showed that the pushrod tube seal was flexing as I pulled on the rod. I loosened the cylinder base nuts and pulled the cylinder back enough to remove and check the seal.
I think it got folded in a way that the end of the rod was catching on the lip of the seal. I re-installed the seal and cylinder. The pushrod is no longer catching.
Once that was done I installed the right head with a new gasket, set the valve lash, oiled the moving components, and installed the valve cover.
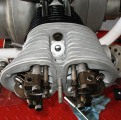
needs exhaust and carburators

Looks like a boxer
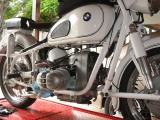
Needs exhaust and carbs
That’s all I had time for this afternoon. Tomorrow I’ll clean up the exhaust and install along with the carbs. It’s supposed to rain — a test start and ride might have to wait until Saturday.