Sunday, Dec 17 2017
Raspberry Pi kit
Kit parts
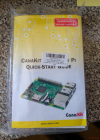
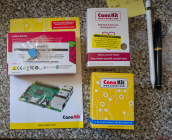
This is the Raspberry Pi kit I ordered. It consists of the Raspberry Pi 3 Model B, a few heat sinks, a case, and a USB power supply. The 3 B version of the Raspberry Pi 3 B is probably overkill for this particular use, but who knows how I may want to use the board in the future.
SDFormat
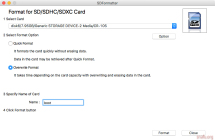
I used SDFormatter to prepare the 8 GB micro SD card that came with the printer. Since I wasn’t in a hurry I selected the Overwrite Format and gave the card the un-original name boot. The Overwrite Format takes a while.
Board mounted in case
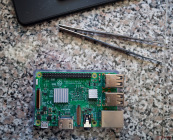
Heat sinks applied
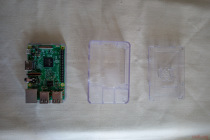
While the formatter was doing its thing I took apart the plastic case. It’s in 3 sections and it took a bit of persuation to remove the middle section from the base. There is a video that shows how its done. Once the board was in the case I applied the two heat sinks that came with the kit. Tweezers helped position the smaller heat sink.
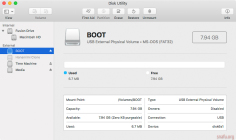
Disk Utility check
When the format completed I had a disk named boot on my desktop. I ran the system Disk Utility to verify the format was MS-DOS (FAT32). I also noted the device: disk6s1 on my machine. I clicked on the Unmount butten which removes the device from the desktop, but does not eject it from the system.
I had already downloaded the current OctoPi image from OctoPrint. To get the unzipped image on the freshly formated SD card I used this command from a terminal window:
sudo dd bs=1m if=2017-06-21-octopi-jessie-lite-0.14.0.img of=/dev/rdisk6 conv=sync
2017-06-21-octopi-jessie-lite-0.14.0.img is the name of the image I downloaded.
/dev/rdisk6 is the “raw” device associated with disk6s1 noted above. The s1 portion is dropped as that indicates a specific partion on the disk.
It took 7 or 8 minutes for the command to complete on my machine. When done the “boot” device was back on my desktop. The last step was to open the device and look for the file named octopi-network.txt. I edited that file to add the name and password of my WiFi network. I don’t have a camera attached at this time so I ignored the other configuration file named octopi.txt.
That was it for pre-running configuration. I ejected the boot device and installed the SD card in the Raspbery Pi. Power on.
I entered the command ssh pi@octopi.local from a terminal window on my desktop. That connected me to the Rasberry Pi. The initial login password was raspberry. The first thing I did was use the passwd command to change the password to something else. With that bit of safety out of the way I closed the ssh session and turned to my web browser.
In Safari I connected to https://octopi.local. Because I used https Safari complained that my connection wasn’t secure and someone was surely eavesdropping on me. This is a side effect of Octopi using a “self signed” security certificate. I told Safari to connect anyway. I think it will remember that the certificate used for this connection is OK. I always prefer to use https instead of http.
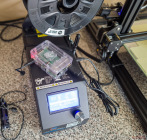
Testing it out

Final config
I created a login with password and answered the setup questions. That lead to downloading the newest version of OctoPrint which lead to a few more setup questions. Within a few minutes setup was complete. Time to try it out.
I dragged a freshly sliced gcode file from my desktop to the OctoPrint page open in Safari. The file was uploaded. No more moving SD cards around. I clicked on the load and print button. The part printed. It was sliced in Cura 3.1.0 which gave me an estimate of about 24 minutes. The actual print time was 2x that value.
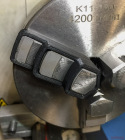
Test fit
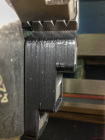
Need to print two more
So what did I print? This is a jaw protector I designed for the 3 jaw chuck of my lathe. Jaw protector may be a misnomer. The part is to protect soft materials from the hardened steel jaws.
I expected I’d have to make tweaks to the design before I’d be able to make it fit. While I could add maybe another mm of overall length the part as printed fit well enough to use. Now I need to print up a couple of more and see how well they will stand up to use.
I did mill a small slot in the cover of the Raspberry Pi case. The slot is for a cable tie that holds the excess USB cable to the side of the case. I didn’t want it accidentally getting in the way of my filament spool.