Friday, Jun 9 2017
I have both a brass hammer and a soft (plastic headed) hammer. When I want to tap something into place in a lathe chuck or make sure a part is seated in the mill vice I find the handle of the hammers gets in the way more often than not. A piece of scrap steel that used to be the counter weight for a light on an arm looks to be just about the size I needed for the body of a handle-less hammer. I have to turn it down a bit to match the brass stock on hand that I’ll use for one of the hammer heads. I also have to order some Delrin for the other head.
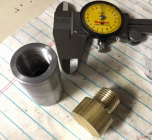
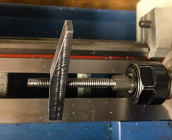
Threads
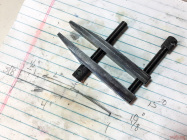
One end done
The body has a rough finish at this point. I’ll make it prettier after I thread the other end for its head. Not that it will be very pretty. It is a hammer, after all. The threads are approx 17 mm with a 1.5 pitch. They didn’t have to match any specific spec, just each other. I was quite happy with the results, especially since this is the first time I can remember turning inside threads.
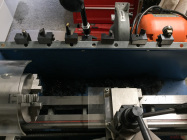
The improved lathe banjo I made makes setting up change gears for thread cutting much easier.
Monday, Jun 12
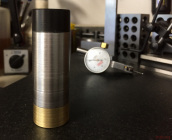
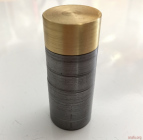
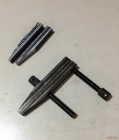
Finished tool
A bar of the generic acetal (Delrin) I ordered arrived this morning. I cut off a 30 mm chunk to turn down and thread. I also threaded the other end of teh body. When the parts were screwed together I turned down the acetal to match the diameter of the body, then skimmed a few thousandths off both head and body to clean up the tool. Good enough. It feels good in my hand.
Lathe Tool rack
This picture shows the light steel angle iron I riveted to the lathe back guard to hold my tool holders and tools. No more turning around and digging through a toolbox drawer to find the tool I need. I could use a few more tool holders.
Friday, Aug 11 2017
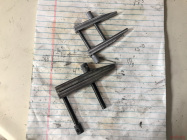
4” Machinists clamp
Machinists clamp
I’ve been busy scraping up the mastic on the garage floor that was left when I pealed away the carpet that had been there forever. Now that I’ve got it removed from all the areas I care about I’ve got some time to play with the lathe and mill. I made a machinists clamp. This one is 4” long and opens about 1 3/4". The jaws are not hardened. Jaws and screws have been blued.
I may make a smaller version. Not sure.
Friday, Aug 18 2017
3” Machinists clamp
I’m sure. The past several afternoons were spent creating 3” version of the clamp.
3" body milled
Drilled and tapped
I started out by cutting a strip of 3/8” steel a little more than 3/8” thick. I squared it up in the mill so it was 3/8” square and about 3” long. The taper was milled at the same 10° angle I used for the 4” version. Holes were drilled for 1/4-20 threads in one piece. The other piece got a clearance hole and a partial hole about .200” in diameter.
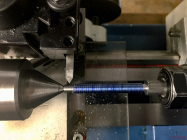
20 TPI Scratch pass
Test fit
I used 3/8” round stock. 2” was turned down to about 1/4” and then threaded at 20 TPI. Once the threads were cut the piece was cut off about 1/2” above the threads. The pieces were turned around and the 1/2” body was knurled. Unlike the 4” version I did not drill any holes through the knurling. Perhaps later if I find then necessary.
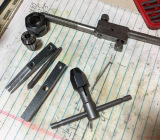
3" pre bluing and 4"
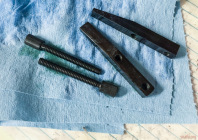
3" blued and oiled
I put the clamp together. It clamps.
I took the clamp apart again for degreasing and bluing. I degreased with dish soap followed by TSP and a final wipe down with alcohol. WHen the alcohol dried I applied bluing. Once the bluing had set for a minute or so I washed the parts, dried them, and applied a thick coat of oil. The last picture shows the oiled parts.
Tomorrow I’ll wipe off the excess oil and put the clamp back together.