1998 October 26 (Monday)
Final drive
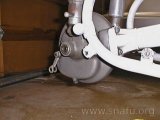
final drive and swing-arm
This day the remaining rear components of the bike were removed. I drained the oil from both the final drive and the swing-arm. The final drive oil looked very dirty. The drain plug contains a little magnet and it appears to have done it’s job. There was a build up of sludge around the magnet that I assume contained a metallic component. This guaranteed the rear end will be torn down. The oil out of the swing-arm looked OK. I added two new crush rings and a rear/drive to swing-arm gasket to the list of things to replace.
Carl Tyler reported that the sludge is somewhat normal, metal bit aren’t. In hindsight the drive was probably fine and didn’t need to be torn down.
Swing-arm
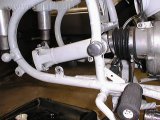
Right side of swing-arm
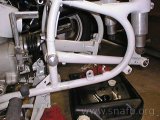
Left side of swing-arm
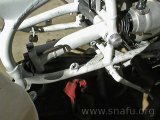
disconnecting the drive shaft
The rubber sleeve between swing-arm and transmission was in excellent condition so I didn’t want to cut it off. I removed the clamp at the transmission, pushed the sleeve back, and watched oil pour onto the floor. Next time I’ll have rags/catch pan ready before moving the rubber sleeve. The U-joint connecting bolts on my bike required a 6mm hex wrench to remove. The books call for a special tool to hold the drive-shaft when removing the bolts. If you look closely at the third picture you can see where I used two hex wrenches: one with the small end through a hole in the coupling bell and the other through a mounting hole 90 degrees from the first to stop the drive shaft from rotating. Removal is easy, but slow as there isn’t much room to work with the rubber sleeve in the way.
There are three other things I could have done, says Ed Korn:
- remove bolts before removing wheel and rear end. Hold wheel.
- put transmission in gear (doh!)
- use the proper technique: position the wrench so it is perpendicular to the line from the center of the flange to the center of the bolt.
Ed also mentioned that the drive shaft Allen bolts should be replaced with the 12 sided bolts that came on later models.
The bearing pivots came out easily using the tools from the tool kit. The final step was removing the bolt that holds the swing-arm to the left shock. The swing-arm bearings and pivots will be looked at later.
Rear shocks

rear shocks
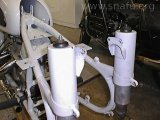
rear shock housing
The shocks were the last thing to remove from the rear end of the bike. The tool kit again provided the means to remove the cap. The adjusting sleave and telescopic leg on both shocks showed signs of rust, needing to be re-plated. The silent blocks were shot and need to be replaced, too.
The lower covering on the right side is scratched up where it was rubbing against the housing. You can see this in the first picture. I hope that was caused by the shot silent blocks and not something more serious. Each shock was bagged separately; they will be further disassembled later.