1998 December 18 (Friday)
Rear shocks
Rear shocks
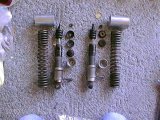
The corroded front shock was still soaking in various penetrating oils. I wasn’t yet able to even get the spring out. This picture is of the rear shock assembly. The plating is shot on both lower leg/adjusting sleeves. They will be removed and plated.
1998 December 19 (Saturday)
Front shock disassembly
cut spring, destroyed shock
Replacement lower eyes
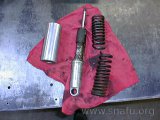
At Joe’s we gave up trying to get the front shock assembly apart intact. Joe cut the spring and then pressed off the upper cover. A lathe was used to clamp the lower leg as we attacked the shock with a pipe wrench. No go. This picture shows the best we could do: a destroyed shock still firmly screwed into the lower leg.
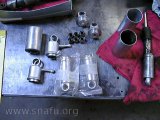
All, however, was not lost. Joe had a pair of lower legs, a complete set of silent blocks, and a spring to replace the one we cut. He also had a pair of rear lowers/adjusting sleeves nicely plated. Some cash and a promise to give him my old parts made the new parts mine.
Joe later told me he eventually had to bore the remains of the old shock out of the eye, using a boring bar in a lathe with the final cut a few thousands from the original threads. He was then able to peel away the last remains of the old shock. When he was finished the old eyes were polished to look as good as the ones pictured below.
Polish shock parts
Polished aluminum, zinc plated parts
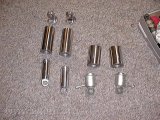
This picture shows the results of a days work. Replacing parts is easy (albeit expensive). At least I could salvage the covers. All four were smoothed with various grits of paper and then buffed on a wheel. I still have some hand work to do on the upper front mounting eyes, but they are getting there. One note: the rear lowers are zinc plated. Original was white cad plating. This does not bother me.
1998 December 22 (Tuesday)
Rear shock

Rear shock
I needed to remove the rear shocks from the lower eyes. As noted above I’ve already picked up a plated replacement eyes and and owe my old ones in trade. Liquid wrench, time, and a large pipe wrench got the shock off of the eye (at a cost of destroying the shock). The eyes and cam were cleaned up and given to Joe.
1998 December 23 (Wednesday)
Front brake housing
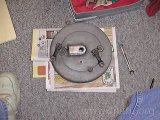
front brake housing
The front brake housing was pretty grungy, especially the actuating levers.
Front brake shoes
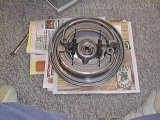
brakes
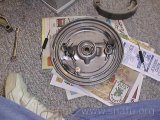
brake shoes removed
This is the inside of the case, before and after the brakes were removed. After removing the shoes I got the worst of the grunge off the case with Aluminum Jelly. A scotchbrite pad, simple green, and WD-40 were also used to get the case clean.
I didn’t note it at the time, but I should have paid attention to the brake springs. They are different and it does make a difference where the springs go.
Carb rebuild parts
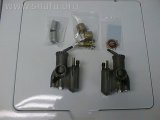
carb rebuild parts
While I was cleaning the front brake housing the UPS man arrived, bringing me an early birthday/Christmas gift: a carburetor rebuild kit plus new slides.