1999 May 20 (Thursday) [continued]
The paint on the damper pressure and friction plates is dry, so I may as well mount the steering damper. Yes, it would have been more correct to paint them a gloss or semi-gloss. I happened to like flat black, instead.
Damper components
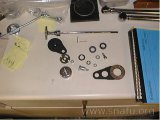
Steering damper parts
These are the steering damper parts. The rubber parts are new. The damper adjusting rod and cap have their original chrome finish. The friction and pressure plates were bead blasted and painted. All other parts were zinc plated.
Steering damper
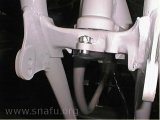
damper, front

damper, bottom
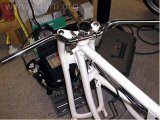
damper, top
View from the front, bottom, and top of the installed damper. I used new cotter pins. This is a friction damper which I am happy to keep instead of trying to find the parts to replace the original hydraulic damper. Sometime in the future I may get the adjusting rod polished and chrome plated. The underside is slightly pitted.
1999 May 22 (Saturday)
Wiring
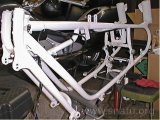
Wiring harness on bike
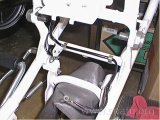
Wiring harness at center stand
These shots show the wiring harness more-or-less installed. The 2nd picture shows the wire clips I had zinc plated. They look quite nice against the white paint. I’ve used a few cable ties. I won’t tie the harness any further until engine, headlight bucket, and horn have been mounted.
Upper engine mount
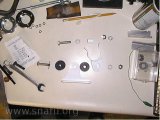
Upper engine mount components
These are the components to mount the upper engine mount to the frame. The stainless steel fastener kit did NOT include everything needed to swap this out. I found two M8x35mm SS bolts at a local hardware store and drilled a hole in the end of one for the cotter pin. The original bolt was M8x32 mm. I could have cut this one off, but instead I’m using an extra rubber washer (since I had one available) to bring the castle nut to where it needs to be. I could not find an M8 stainless nut, so am using a zinc plated nut as part of the tube clamp hardware.
I did not get the little tube used to cover the tube clamp mounting bolt powder coated. I probably should have. Instead, I cleaned it up Thursday and gave it a few coats of white paint from a spray can. As it lives under the tank the paint was just for rust protection, not show. But it does look better!
Engine mount on frame
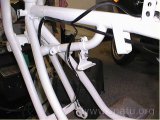
Engine mount on frame
This image shows the complete assembly mounted to the frame. I have not torqued anything down at this point. That will wait until the engine has been installed so I can get the positioning correct.